Installing GDAL for Windows
GDAL is a useful command line tool to process spatial data, if you haven’t heard of the tool before some examples of what it can do are:
- Create contours from a DEM
- Create a TMS tile structure
- Rasterize vector into a raster file
- Build a quick mosaic from a set of images
Each of the above functions are python scripts which can be run from the command-line once GDAL is successfully installed.
This tutorial covers how to install GDAL on a Windows PC, if you are interested in getting GDAL running on a Mac please go here (https://sandbox.idre.ucla.edu/sandbox/general/how-to-install-and-run-gdal)
Step 1: Install Python
Python is necessary for GDAL, and if you already have an installation of Python then skip to step 4 below.
1. Feel free to download the latest 2.7x version of python (rather than the 3.x python version).
The python version used for this tutorial can be downloaded here:
https://www.python.org/ftp/python/2.7.8/python-2.7.8.msi
2. Install python with the default options and directories.
3. After installation, go to Python –> IDLE (Python GUI) to find out what version of Python you are using:

4. Make a note of the number that shows the version of your Python in the top right, as highlighted below:

Note: MSC v.1500 may differ if you are using a different Python installation, if it does then please make a note of that number. Note, if you installed the 64-bit version of Python, for the rest of the tutorial please remove the (x86) from the paths.
Step 2: Install GDAL
1. Head over to Tamas Szekeres’ Windows binaries and download the appropriate GDAL Binary.
For this tutorial, we are using the MSC v.1500 on a 32-bit system, the picture below illustrates how to match the version with your own python version. The blue highlight is where you should look for either 64-bit or 32-bit systems, and the green shows the release-1500 number which should match the number from IDLE in step 4 above.

2. Clicking the link will take you to the list of binaries (installers) to download.

3. Locate the “core” installer, which has most of the components for GDAL.

4. After downloading your version, install GDAL with standard settings.
5. Next, return to the list of GDAL binaries and install the python bindings for your version of Python, this can either be 2.7, 3.1, or 3.2.
Recall that we had installed Python 2.7 earlier, so we have to locate this version, as seen below:

6. Download the Python bindings and install them.
Step 3: Adding Path Variables:
We need to tell Windows system where the GDAL installations are located, so we need to add some system variables.
1. Right click on “Computer” on the desktop and go to “Properties”:

2. Click on Advanced System Properties

3. Select Environment Variables.

4. Under the System variables pane, find the ‘Path’ variable, then click on Edit.

5. Go to the end of the box and copy and paste the following:
;C:\Program Files (x86)\GDAL
Note: For 64-bit GDAL installations you would simply remove the (x86) after Program Files.
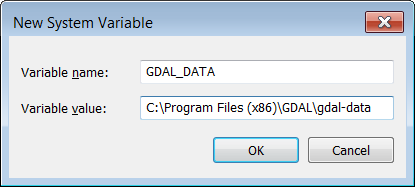
6. In the same System variables pane, click on “New” and then add the following in the dialogue box:
Variable name: GDAL_DATA
Variable value: C:\Program Files (x86)\GDAL\gdal-data

7. Click “OK”
8. Add one more new variable by clicking “New…”
10. Add the following in the dialogue box:
Variable name: GDAL_DRIVER_PATH
Variable value: C:\Program Files (x86)\GDAL\gdalplugins
11. Click “OK”
Step 4: Testing the GDAL install
1. Open the Windows command line, by going to the Start Menu -> Run ->Type in cmd and press Enter.
2. Type in
gdalinfo --version
3. Press Enter.
4. If you get the following result, then congratulations your GDAL installation worked smoothly!

Awesomeeee!!
Thanks for this great guide! Only one that actually helped with clear instructions 🙂
Thank you very much for the positive feedback Nick! Feel free to share the guide with anyone who may find use for it!
Hey!
Just a quick question while running the version command I get the error
ogr_MSSQLSpatial.dll , the specified module couldnt be found.
But it displays version and release date.
I’m working with Spyder rn , and when I try to import gdal it says no module found.
Any help would be appreciated.
Hello
I am also having the similar kind of problem.
Can you help me to use gdal with Matlab anyway.
same error. even gdal have ogr_MSSQLSpatial.dll
Have you installed GDAL as ‘Typical’ or as ‘Complete’ in the core msi installer?
When I installed it as ‘Complete’ I had the same problem with ogr_MSSQLSpatial.dll, but when I uninstalled GDAL and reinstalled it as ‘Typical’, the problem was solved.
See: https://trac.osgeo.org/gdal/ticket/6589
If you are not looking for SQL Server stuff, that will hopefully solve your problem guys.
Delete ogr_MSSQLSpatial.dll from gdalplugins
[crayon-5a4f16390978c204694594 lang=”default” decode=”true” inline=”1″ ]gdalinfo –version
[crayon-5a4f16390978c204694594 it is not recognized as a batch file this is the error i am getting
Oh sorry, you should be typing in “gdalinfo –version”, the other stuff is a mistake from the wordpress crayon plugin!
[crayon-5afbe5446446b421143482 lang=”default” decode=”true” inline=”1″ ]gdalinfo –version…
did u type all this in step-4??????
That’s just a formatting error. All you need to type is: gdalinfo –version
only type gdalinfo–version
giving an error….”not recognised as an internal or external command”
It’s good tutorial. Gdal is working but i can’t run python stuffs like gdal_merge.py or “from osgeo import gdal”, it gives an error like: DLL load failed. Could you guys please guide me a bit more on this. Thanking in advance.
Thank you for the feedback Alam! To help with your situation further, what environment are you trying to run GDAL under? Is it the Python IDLE or the Windows Command line?
It looks like the link is no longer active to download the .msi files. Is there another website?
Having the same problem as Alam. Running from Idle.
Anyways, great post!
i have a probleme when i am executing this command python manage.py runserver
the error message i get in __init__ self._handle=_dlopen(self._name,mode)
OSError:[WinError 126] le module spécifié est introuvable
Hi, I follow all the instructions but I get ‘gdalinfo’ is not recognized as an internal or external command, operable program or batch file. Could you please help me to solve this? thank you. Nice guide!
please share the guide
What guide are you referring to?
Thanks a lot for this guide. I mean it.
Works like a charm. Thanks for posting!
One caveat: on my Windows 7 32-bit virtual machine, the path is still c:Program Files and not c:Program Files (x86). Might be so for more users.
Oh, this must be a change with Windows 10? I’ll edit the post to reflect that if this is the case!
You rock! Thank you my brother in code!
If only all installation processes were documented so precisely… Thank you so much!
Haha, thank you for the compliment!
Gdal is working but i cannot import gdal in python currendly using python idle
if you are a user of arcgis, then the cause is probably because you are using the python idle that is bundled with arcgis/arcpy; not the other python installation. otherwise, you should check to see if your python class path includes gdal or not:
http://imgur.com/3eAqlFm
if it doesn’t, then you should add gdal to your python path.
hope that helps!
Please how can I add gdal to my python path?
I would like to know this too
I tried it in windows 10. Basic binding command “from osgeo import gdal” did not work from IDLE (python GUI) at the beginning. Then it tried from Python (command line) and it worked fine. Latter it also worked from IDLE. Thanks
Thank you very much!!! You’ve saved me!!!!
You are very welcome! Glad you found this useful! =)
Hey Albert,
I see a couple people have referenced the same issue I’m having and I wondering if you have the solution!
Gdal works from command line (and THANK YOU for that!) however I’m unable to use the GDAL module in any of my python IDEs (sublime, pyscripter).
I am in fact using ArcGIS (C:Python27) is my installation location.
Any tips?
Hello Tom,
Oh yes, if you are using ArcGIS’s Python installation, then yes you will not be able to use GDAL in those IDEs because ArcGIS’s Python installation was installed first.
If you want to enable support for GDAL in those IDEs you have to include the path to the GDAL Python installation in your Build Environments. In my case, C:Python27gdal needs to be included in the Python Paths under PyScripter’s Tools panel: http://imgur.com/g0DntAh
Hope this helps!
Thanks a lot, this is such a great help.
Great guide, thanks. Probably the cleanest GDAL install I’ve ever had.
Dude … you are a hero … get yourself a cape and a mask.
I was looking for a site with gdal installation instructions for a new convert to the gdal religion.
Awesomeness
Great Guide.
very nice tutorial ! All works fine now !! BIG THANKS
Very useful tutorial. Thanks for sharing
still I am getting ‘gdalinfo’ is not recognised as an internal or external command, operable program or batch file
Thx a lot!
Amazingly straight forward and clear instructions. Thank you!
When I try to install 64b version, I can’t use gdal_calc.py. It reports following error:
Traceback (most recent call last):
File “C:\Program Files\GDAL\gdal_calc.py”, line 50, in
from gdalnumeric import *
ImportError: No module named gdalnumeric
No matching distribution for gdalnumeric is found by pip. I don’t have numpy installed by default, however if I install it, the same error is reported. I don’t have any problems with 32bit version. Of course, my environment variables are set to C:\Program Files\…, nor (x86) 😉
receive the error when trying to use gdal2tiles.py from cmd
line 44, import error no module named osgeo
Thank you for the help, however I am having a serious amount of trouble with GDAL. I followed the steps that you listed and unfortunately the command prompt isn’t recognizing gdalinfo as an internal or external command.
I’ve tried uninstalling and reinstalling using this process several times to no avail.
Perhaps it’s the environments variables that I have set up?
GDAL_DATA > C:\Program Files(x86)\gdal-data
GDAL_DRIVER_PATH > C:\Program Files(x86)gdalplugins
To be honest, I am a newbie and this environment variable aspect is tripping me up.
A couple of questions before I can troubleshoot:
1) What version of python are you using?
2) What version of Windows are you using (and is it 32 or 64 bit)?
3) What does your “PATH” variable look like?
Looking forward to hearing back from you!
For me that is:
1) Python 2.7.10
2) Windows 10 Pro 64 bit
3) Under the Path variable I added C:\Program Files (x86)\GDAL which is visible in a new line
I use Windows10 64b
Python 2.7.12 (64b)
GDAL 1.11.4 (installed via gdal-111-1500-x64-core.msi)
Python bindings installed via GDAL-1.11.4.win-amd64-py2.7.msi
PATH entries connected with Python and GDAL:
C:\Python27;C:\Python27\Scripts;C:\Program Files\GDAL
GDAL_DATA=C:\Program Files\GDAL\gdal-data
GDAL_DRIVER_PATH=C:\Program Files\GDAL\gdalplugins
gdal2tiles.py and other e.g. gdaltranslate seem to work as expected, but gdal_calc.py is missing that gdalnumeric. When I install 32bit version, it works fine (even I have to install missing numpy Python module).
Thanks.
I am having the same problem as Ido. Any suggestions anyone? Thanks!
Similar to a couple of the other posts, my issue is that I cannot import GDAL modules without first importing arcpy. But only in the Windows command line and IDLE – if I try to import GDAL modules within the ArcMap/ArcCatalog Python window, I am successful.
In IDLE and Windows command line, ‘from osgeo import gdal’ throws an error:
ImportError: DLL load failed: The operating system cannot run %1.
However, if I ‘import arcpy’ first, then I can import the GDAL modules.
And, as I mentioned, the Python window from within Arc does NOT throw the error – I can use ‘from osgeo import gdal’ right off the bat, without importing arcpy.
Any insights?
One of the best installation tutorials ever.Had no problem following it.You saved a lot of my time. Thankyou
Thank you!
For anyone struggling with the external, internal paht not found, when using the cmd. Check where your file is and add \ for each time the folder changes as my computer wouldn’t understand it without them.
For example, my data was in C:\Program Files (x86)\ GDAL\ gdal-data
On this tutorial the \ aren’t used which meant my laptop couldn’t find it.
all the back slashes are missing in the instructions above.
Maybe it is a problem with my browser.
After entering the extra \ everything worked.
thanks
thank you for catching that! i don’t know what happened to them, but i just re-added them now!
Thanks a lot for your clear and efficient tutorial!
The BEST tutorial I have seen. Thank you, Albert!
Plain awesome!! Thanks for putting this together!
Hi,
I agree this is a very good and straight forward guide, but my command window closes really fast. I tried it with putting in the slashes and without
GDAL_DATA
C:Program Files (x86)GDALgdal-data
And
C:\Program Files (x86)\GDAL\gdal-data
Also, I unistalled phython and GDAL, restated my machine, and re-installed everything but get the same problem. I am running windows 10. What am I doing wrong?
If the command line is closing really fast, then you should try going to the command prompt (Start Menu –> Command Prompt) and typing in “gdalinfo –version” to test your installation.
You need to add “C:\Program Files (x86)\GDAL\gdal-data” into your system variables, not the command prompt though. In order to do that you should follow Step 3: Adding Path Variables.
Hope that helps!
I am facing an error when i try to use the gdal_translate command, t cannot find org_MSSQLSpatial.dll. Is there any way to solve this?
Just delete the org_MSSQLSpatial.dll if you are not using MS SQLServer.
There is a missing backslash at the GDAL_DATA variable value:
Variable value: C:\Program Files (x86)\GDALgdal-data
should be:
Variable value: C:\Program Files (x86)\GDAL\gdal-data
The screenshot shows the correct value.
Any thoughts on how to run gdal2tiles (with or without parallel) without command prompt? My workstation isn’t allowed to use it due to network restrictions. We do however have permissions to use PowerShell. Getting GDAL to run buildvrt and other basic functions isn’t an issue but to make the TMS we would like to use gdal2tiles (preferably gdal2tiles_parallel). I know this is quite the reach but any thoughts/help is greatly appreciated.
Brother, you are great!!! A awesome instruction.. !! You just help me a lot!!
Not sure if this is the right place to post, but worth a try.
I have successfully installed GDAL (thanks for the great guide!) on a new machine. The script for which I need GDAL, however, does not work. From having the same problem in the past on my other computer, I found out that the reason the script did not work was that GDAL was not working well with numpy. The solution was to install an older version of GDAL compatible with numpy 1.7.
Here is my problem, the archived distribution no longer include the .msi installer. Any suggestions as to how to solve this? (i.e. is there a way to install the compiled binaries archived on the GISinternals website)
Thank you!
This saved me today.
this is really super…easy to follow….but there IS a problem that many people comment about. it is common to get the error message :
ImportError: No module named _gdal_array
when you try to assign to a numpy array with this kind of code:
ImportError: No module named _gdal_array
Can you try to alter the process to make this go away? I’m installing under py 2.7 in win10… Again, there are many people having problems with this
Unfortunately trying to install this on a client laptop without Administrator access, any suggestions on how to install GDAL manually?
When I run gdalinfo I get a lot of these errors
ERROR 1: Can’t load requested DLL: C:\Users\jor0135\Program_Files\GDAL\gdalplugins\gdal_netCDF.dll
14001: The application has failed to start because its side-by-side configuration is incorrect. Please see the application event log or use the command-line sxstrace.exe tool for more detail.
i tried to install on windows 10 and the GDAL installed, but the last step don’t, when i verified it doesn’t run the code, actually a i have installed arcgis 10.2. does it cause a problems?
from gdalplugins folder delete ogr_MSSQLSpatial.dll
hi, i have this strange error and i dont know what to do plz help me 🙂
GDAL 2.1.3, released 2017/20/01
C:\Users\Valdas>gdalinfo –version
GDAL 2.1.3, released 2017/20/01
C:\Users\Valdas>python
Python 3.6.1 |Anaconda 4.4.0 (64-bit)| (default, May 11 2017, 13:25:24) [MSC v.1900 64 bit (AMD64)] on win32
Type “help”, “copyright”, “credits” or “license” for more information.
>>> import gdal
Traceback (most recent call last):
File “”, line 1, in
File “C:\Users\Valdas\Anaconda3\lib\site-packages\gdal.py”, line 2, in
from osgeo.gdal import deprecation_warn
File “C:\Users\Valdas\Anaconda3\lib\site-packages\osgeo\__init__.py”, line 21, in
_gdal = swig_import_helper()
File “C:\Users\Valdas\Anaconda3\lib\site-packages\osgeo\__init__.py”, line 17, in swig_import_helper
_mod = imp.load_module(‘_gdal’, fp, pathname, description)
File “C:\Users\Valdas\Anaconda3\lib\imp.py”, line 242, in load_module
return load_dynamic(name, filename, file)
File “C:\Users\Valdas\Anaconda3\lib\imp.py”, line 342, in load_dynamic
return _load(spec)
ImportError: DLL load failed: The specified module could not be found.
>>>
I got the same error. Did you solve it?
Hi
I am facing the same issue.
How did you solve it
Thanks for this awesome tutorial. Awaiting more
Hey when I use the version command it works fine but it only works when my directory is located in GDAL Program Files folder (C:\Program Files\GDAL) . What can I change so that the command works even when I’m in a higher folder like C:?
Wow, Thanks for the detailed instructions. Nice Post
Tried installing the GDAL Version 2.2.1 today and kept getting ” ‘gdalinfo’ is not recognized as an internal or external command ” error in command prompt. After checking the system variables a few times for typos, I ended up uninstalling the 2.2.1 version and installing the 1.11.4 version. Seems to be working ok now when I check in CMD prompt. More or less an FYI I suppose. Not sure if others have encountered this behavior …
OS: Windows 10, 64-bit
Python: 2.7.1 (32-bit)
There’s a presentational problem under Step 4, to do with the crayon WordPress plugin (it seems). Instead of showing simply ‘gdalinfo –version’ there’s a whole load of other crayon-related gubbins (using Chrome)
Thanks, Sir Nice Article.
Thanks for sharing the post… very informative
Thanks for your good information.
Thanks for this good tutorial
I have successfully installed GDAL in windows
I want to use it with OpenCV library to read multispectral images
But when I CMAKE, it asks me to set two path: GDAL_LIBRARY and GDAL_INCLUDE_DIR
I don’t what are the differecnes. I set C:\Program Files (x86)\GDAL for both but CMAKE tells me:
WARNING: Target “opencv_imgcodecs” requests linking to directory “C:/Program Files (x86)/GDAL”. Targets may link only to libraries. CMake is dropping the item.
Could you please help me?
This tutorial is great. Thanks
Thanks for the great help
thanks for the great post. it helped me and my team.
Hi,
Thanks for the installation tutorial – it worked a treat. One issue though that I have encountered. Other people have posted on this as well. When I type gdalinfo –version on the windows command line I get:
ERROR 1: Can’t load requested DLL: C:\Program Files\GDAL\gdalplugins\ogr_MSSQLSpatial.dll
126: The specified module could not be found
I had a look and ogr_MSSQLSpatial.dll does exists in the folder (C:\Program Files\GDAL\gdalplugins) yet for some reason it cannot find it.
My environmental variables are as following:
Variable Name: GDAL_DATA
Variable Value: C:\Program Files\GDAL\gdal-data
Variable Name: GDAL_DRIVER_PATH
Variable Name: C:\Program Files\GDAL\gdalplugins
Variable Name: Path
Variable Value: C:\Python27;C:\Program Files\GDAL
I have Python 2.7.15 [MSC v.1500 64 bit (AMD64)] and installed
gdal-202-1500-x64-core.msi and GDAL-2.2.3.win-amd64-py2.7.msi
I should note that:
from osgeo import gdal
from osgeo.gdalconst import *
work fine on the Python 2.7.15 shell and I am able to load and save ENVI datasets.
Is there any way I can fix this ogr_MSSQLSpatial.dll issue.
Cheers
Rodrigo
I installed (Windows 10, GDAL 1.11.4, released 2016/01/25) it as you explained and set all enviroment variable then i get this
error:
FAILURE: no target datasource provided
C:\Program Files\GDAL>ogr2ogr -f GPKG Berlin.gpkg “C:\Users\alo\Desktop\London.osm”
FAILURE:
Unable to open datasource `C:\Users\alo\Desktop\London.osm’ with the following drivers.
-> ESRI Shapefile
-> MapInfo File
-> UK .NTF
-> SDTS
-> TIGER
-> S57
-> DGN
-> VRT
-> REC
-> Memory
-> BNA
-> CSV
-> NAS
-> GML
-> GPX
-> LIBKML
-> KML
-> GeoJSON
-> Interlis 1
-> Interlis 2
-> GMT
-> GPKG
-> SQLite
-> ODBC
-> WAsP
-> PGeo
-> MSSQLSpatial
-> PostgreSQL
-> MySQL
-> PCIDSK
-> OpenFileGDB
-> XPlane
-> AVCBin
-> AVCE00
-> DXF
-> Geoconcept
-> GeoRSS
-> GPSTrackMaker
-> VFK
-> PGDump
-> OSM
-> GPSBabel
-> SUA
-> OpenAir
-> PDS
-> WFS
-> HTF
-> AeronavFAA
-> Geomedia
-> EDIGEO
-> GFT
-> GME
-> SVG
-> CouchDB
-> Idrisi
-> ARCGEN
-> SEGUKOOA
-> SEGY
-> ODS
-> XLSX
-> ElasticSearch
-> PDF
-> Walk
-> CartoDB
-> SXF
Potentially, that error could be because the “C:\Users\alo\Desktop\London.osm” file is missing or not accessible.
Hey Albert, it is very kind of you to take time and write this awesome guide, I knew how to install Python and GDAL but I couldn’t add the path variables properly, this guide helped me overcome that issue.
Keep up the great work bro, God bless you 🙂
I have install geopandas. Almost all dependencies have installed. What I did was I downloaded GDAL afterwards. So in anaconda prompt it showing ” This system cannot find the path specified.
C:\Users\prajapati jyoti>set “GDAL_DRIVER_PATH=” ”
I did everything u said above after installing geopandas. Now I m not able to install geopandas again. Even after setting GDAL_DRIVER_PATH it showing same. Please help me. I want to use ‘crs’ in import geopandas but I not able to. What should I do now. How to resolve this problem
Let me preface this by saying i have not used geopandas before but 1) anaconda is a separate python installation that should not be affected by system variables… this means your conda path should only be governed by conda.. and not effected by my installation instructions above 2) you can try to delete the (gdal_driver) if you think that might help you install geopandas again though.. if you want to set a coordinate system i would recommend using gdal’s projection tool:
https://www.gdal.org/osr_tutorial.html
This tutorial with screenshot guidance is so straight forward, easy to understand, and works perfect for me!
As a beginner, this is all I need to know. Great post, very informative and useful! Thanks for sharing your work and keep up the great work.
I really wish that this worked – I’m a bit of a python newbie and I’ve been trying to just run “from osgeo import gdal” in one of my scripts for days but nothing is working. After trying this procedure outlined above, I get “error 1: can’t load requested DLL…” for my gdalplugins whenever I try “gdalinfo –version.” I’ve downloaded anaconda python 2.7 and I have a couple ArcGIS installations as well, and I’ve tried copying the osgeo module folder into each site-packages folder but whenever I run my one wee script with IDLE I get the error “No module named _gdal”. Workin with windows.
Please help a grad student in need!
This was so very helpful, thank you for documenting!
Thanks for Sharing
As a beginner, this is all I need! Thanks so much, it really helps!
This actually worked for me man. Thank you so much!!
The gdal test went smoothly.
Awesome post and explained very well. I found your post very useful while installation.
Hello, I installed gdal and gdalinfo –version works perfectly. However, when I type “python” on the cmd to open the python shell and try to import gdal, there is an error saying that module not found. How do I solve it? Thanks
It actually worked for me. Thanks
After installation of gdal (to enable PostGIS tools) on Windows, sf gives warnings about dependencies?
As gdal continues to release, how to adjust to this tutorial?
Python 2.7.16 is still MSC v. 1500, but as of Nov. 2019, a win 32, realease-1500 isn’t available from gdal when following the link to Tamas Szekeres’ Windows binaries as provided above.
Only 1900 & up are still available.
So, for a newbie, that’s a bit confusing. What must the user know as time moves forward, in order to continue applying this tutorial?
Thanks.
to run gdal .py tools, try not to install into C:\Program Files\GDAL install it in C:\GDAL is better.
Cheers,
My python version is MSC v.1916 64 bit (AMD64)] on win32 while GDAL only has MSC1911.
How to resolve this issue?
Thanks
I have the same problem
i have a version of python 64 bit on win 32, i dont know what installer use if i use for x64 or win32
please help
Very Useful tutorial, thanks for sharing, keep sharing
Good information. Lucky me I found your site by chance (stumbleupon).
I’ve book marked it for later!
Thank you!
An interesting read that we might suggest our students view while learning to install python
Very well done guide. Thanks a lot mate.
very helpful, thank you! 🙂
The core installer does not seem to function on a Windows Server 2016 machine. A double click turns on the stopwatch for a brief moment then nothing at all. There isn’t anything the task list running either.
Ignore my last reply, the server had the downloaded files blocked. Everything worked just fine once they had been unblocked.
Very detailed and useful tutorial. Thanks a lot
Thanks, the best tutorial!!!!
nice info thanks for the post
command-line once GDAL is nice
This is simple and clear
Very good content. I love it. Keep it up.
very helpful article
Thanks.
Thank you for the article!
screenshots helped me a lot
You are the best thank you so much 😀
Hi! Thanks for the tutorial! I did everything step by step, twice.
“‘gdalinfo’ is not recognized as an internal or external command,
operable program or batch file.”
any suggestions? Has anything changed since you wrote this tutorial?
win 10 home, python 3.8, gdal301.dll
Thank you
Great piece of information mate, still helping people like me 🙂
it was hard to reach comment section for the post awesomeness
Thank you so much 🙂
Best tutorial, thank you